
-
YumaPOS
-
- The YumaPOS Ecosystem
- Plan Where You Want to be in 6 and 12 Months from Now
- Create Your YumaPOS TENANT
- Create STORES in your YumaPOS TENANT
- Make Life Easy : Preset Some Basic Settings
- Which is best for You? Manual Entry or Data Import?
- Great Structure Makes Selling Easier
- Positive Planning Prevents Poor Performance
- POS and ORDER Fundamentals
- Getting to Know Your New BOM
- Cheap Internet Can Cost Businesses Time, Money and Productivity
- Security : Do you Really Want Your Staff Doing That?
- Stock Control: What It Is and How to Know If It’s Right for Your Business
- Scale Your Business : YumaPOS for Single to Franchise Growth
- A Quick Guide to Where ITEM Cost Comes From
- Know Your Customers, Earn Their Loyalty, Grow Your Sales
- Yumapos Price Lists, Holiday Promotions & Surcharging - Made Easy
- Show Remaining Articles (2) Collapse Articles
-
-
- Quickly List Transactions Created by Your STORES and APPs
- Easily See Transactions by Staff Member
- It is Simple to Track Sales by Terminal
- Processing Order Tracking: How to Minimise Operational Loss
- Voided Orders Explained: Why You Need to Catch Them
- Action Logs: Why they are Important to Your Business
-
-
- Articles coming soon
-
- Articles coming soon
-
- Articles coming soon
-
- Articles coming soon
-
- Articles coming soon
-
- Articles coming soon
-
-
-
- Articles coming soon
-
- Articles coming soon
-
- Articles coming soon
-
- Articles coming soon
-
- Articles coming soon
-
- Articles coming soon
-
- Articles coming soon
-
- Articles coming soon
-
- Articles coming soon
-
- Articles coming soon
-
- Articles coming soon
-
- Articles coming soon
-
- Articles coming soon
-
-
-
- Articles coming soon
-
- Articles coming soon
-
- Articles coming soon
-
- Articles coming soon
-
- Articles coming soon
-
- Articles coming soon
-
- Articles coming soon
-
- Articles coming soon
-
-
-
- Articles coming soon
-
- Articles coming soon
-
- Articles coming soon
-
- Articles coming soon
-
-
-
- Articles coming soon
-
- Articles coming soon
-
- Articles coming soon
-
- Articles coming soon
-
- Articles coming soon
-
- Articles coming soon
-
-
-
- Articles coming soon
-
- Articles coming soon
-
- Articles coming soon
-
-
-
- Articles coming soon
-
- Articles coming soon
-
- Articles coming soon
-
- Articles coming soon
-
- Articles coming soon
-
-
-
- Articles coming soon
-
- Articles coming soon
-
- Articles coming soon
-
- Articles coming soon
-
-
-
- Articles coming soon
-
- Articles coming soon
-
- Articles coming soon
-
- Articles coming soon
-
-
- Articles coming soon
-
-
- Articles coming soon
-
- Articles coming soon
-
- Articles coming soon
-
- Articles coming soon
-
- Articles coming soon
-
- Articles coming soon
-
- Articles coming soon
-
- Articles coming soon
-
- Articles coming soon
-
- Articles coming soon
-
- Articles coming soon
-
-
-
- Articles coming soon
-
- Articles coming soon
-
- Articles coming soon
-
- Articles coming soon
-
- Articles coming soon
-
- Articles coming soon
-
- Articles coming soon
-
- Articles coming soon
-
- Articles coming soon
-
- Articles coming soon
-
- Articles coming soon
-
-
-
- Articles coming soon
-
- Articles coming soon
-
- Articles coming soon
-
- Articles coming soon
-
- Articles coming soon
-
- Articles coming soon
-
-
- Articles coming soon
-
- Articles coming soon
-
- Articles coming soon
-
- Articles coming soon
-
- Articles coming soon
-
- Articles coming soon
-
- Articles coming soon
-
-
- Articles coming soon
-
- Articles coming soon
-
- Articles coming soon
-
- Articles coming soon
-
- Articles coming soon
-
- Articles coming soon
-
- Articles coming soon
-
-
- Articles coming soon
-
-
-
YumaPAY
< All Topics
Print
YumaPAY Pinpad Connecting Base Via Ethernet
Updated
Multiple Connection Methods
Depending on the use-case, the model of pinpad and any accessories you are using, you will have data options that may include :
- 4G
- WIFI 2.4GHz
- WIFI 5GHz
- Ethernet
- Bluetooth
I will always prefer to use copper cable, leaving all the rest as backup data channels.
Connect the Base
- Connect the base into a power source
- Plug the base into your LAN using a suitable network cable
Pair the Pinpad to the Base
- Swipe down from the top of the terminal screen
- Select Launcher
NOTE: If you only see gallery after selecting Launcher, swipe up on the screen to get to Device Manager
- From the Launcher menu select Base Control
- Select Pair a new Dock
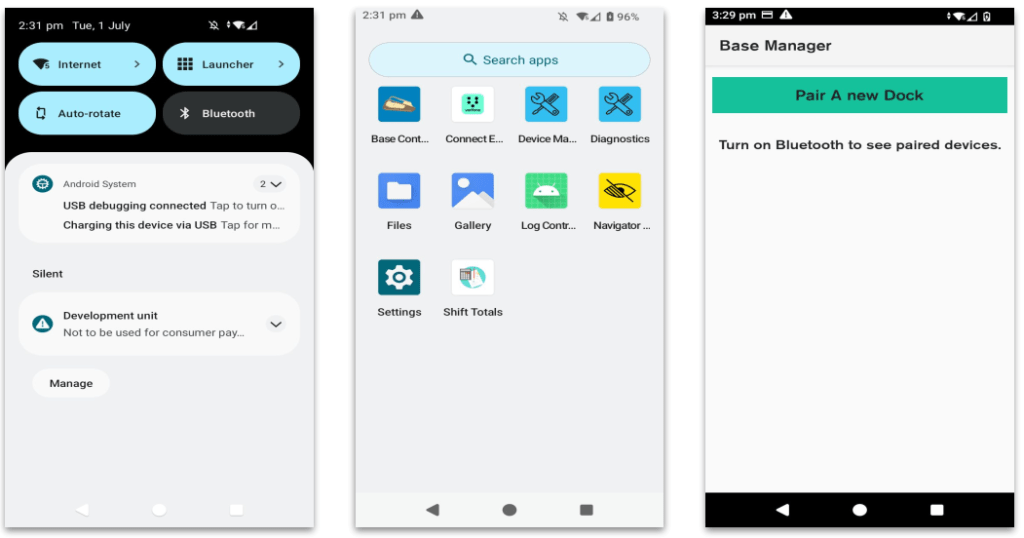
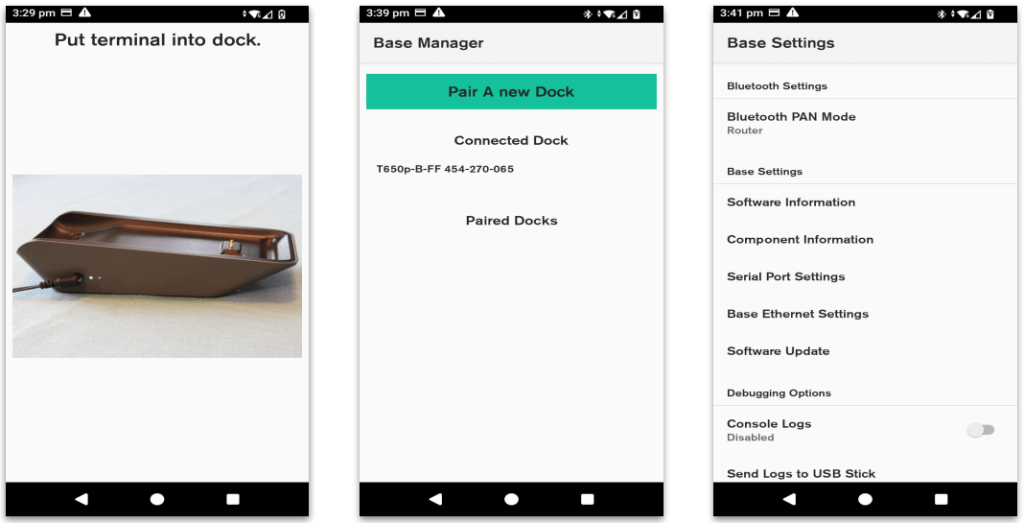
- Place the terminal into the base
- Wait for pairing to be negotiated
- Once connected, you should see the terminal base listed under Connected Dock
- It will look something like
- T650-B-FF 54-270-065
- Selected the Connected Dock
- Select Software Update
- After selecting Software update, you should see an IP address under Base Eth IPv4 Address
- Please disable WIFI on the pinpad terminal
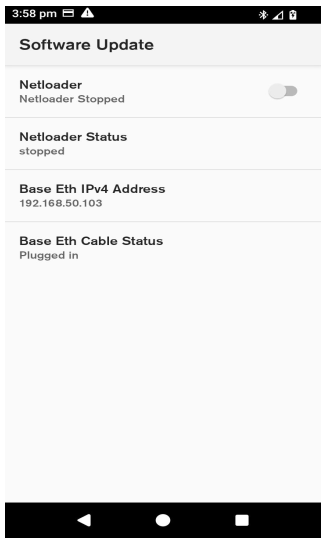
Table of Contents